Commission Painting and Pricing

Yes, I do take commissions.

Infantry are $15 a model, regardless of size, up to 32mm round base.
Large Infantry and Cavalry are $30 a model, up to 50mm round base.
Extra Large Infantry are $45 a model, up to 60mm round base.
Vehicles are based on size:
$150 for 40k dread sized (60mm base)
$200 for 40k Rhino chassis or similar, smaller fliers (Storm Talon)
$400 for 40k Land Raider, larger fliers (Storm Raven).
Forge World and Collossals - prices vary

These prices include all assembly and basing. If you already have models assembled, primed, or want to do the basing yourself, please contact me and we can talk about reducing the price.

What you get for your money - models will be cleaned of any mold lines and flash, assembled, primed, painted, based, and matte varnished for protection. Will always be beyond the 3 color minimum for tournaments, and will include the little details that we all want. I will paint an army for you that I would be proud to play with myself. I will do custom color schemes, as well as traditional "from the book" schemes. I only have one level, and that is fully painted.

About Me

I paint models and have been doing it since I was 12. Over the years I have learned tons of tricks and painted loads of models. I have ran a very successful Miniatures studio, and owned a Retail Game Store. After closing those, I decided to get a little smaller with the operation and I am back to a one man show.

Search This Blog

3/26/13

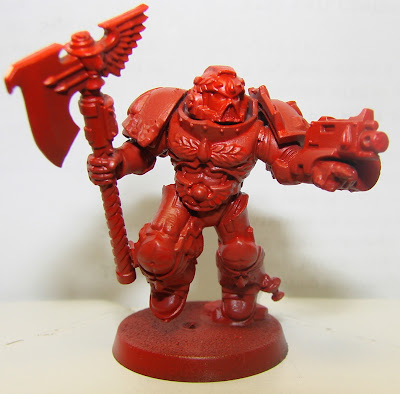
Blood Angels - getting red that is simple and cool looking.

Okay, so those of you that game with me know that I LOATH painting red.  Hate it.  And I hate it because everytime I have painted it in the past, the finished product really looked choppy with the highlights.  You can't mix white into it because then it looks pink, so you have to use orange, and then it looks like your models are on fire.......well enter the GW washes.....both the old Baal Red and the Carrowburg Crimson.  They both provide a good finish to help "blend" all the highlights down a notch to make them look more natural.

Here are the steps to, what I think, is one of the best red schemes I have come up with.


Step 1 - Okay, technically not Step 1, but we have to remember that primer is important.  For all of the Blood Drinker (Blood Angel Successor Chapter) models I have painted thus far, I have stuck with Army Painter Red Primer.  It helps to give a good undertone and is not as hard to cover as the basic black primer, and not as picky as white primer (which can make the models look uber bright, not what I was going for.)

Step 2 - Give a watered down coat, across all main red areas, of Skorne Red (P3).  I like the Skorne Red because of the depth of the color.

Step 3 - Paint on a coat of Khador Red (P3).  This has a more vibrant feel.  It is okay to leave the Skorne Red from last step showing in some of the cracks.

Step 4 - No apply Evil Sunz Scarlet (GW) to the red areas, again leaving the last 2 colors present in the cracks.
Step 5 - Using Troll Slayer Orange (GW), apply an thin highlight to the areas that would be affected by light reflecting.  I typically do not use a "focal" point light source.  I normally just do the edge highlights on the raised edges, as if the light was coming from my eyes to the model. If the highlight gets thick, then thin it back out by using the scarlet from last step to paint the highlight back 
*hint - I do this for black edge highlights**

Step 6 - Now wash the entire red surface with Carroburg Crimson.  No need to water it down, just be careful that you use a light wash, as this wash will darken the model tremendously!

Tomorrow evening, I will finish off the Honor Guard, and provide tutorials on how I am finishing this squad up.

On a side note - **SQUEEE!!!! My Forge World order just shipped!


No comments: