Commission Painting and Pricing

Yes, I do take commissions.

Infantry are $15 a model, regardless of size, up to 32mm round base.
Large Infantry and Cavalry are $30 a model, up to 50mm round base.
Extra Large Infantry are $45 a model, up to 60mm round base.
Vehicles are based on size:
$150 for 40k dread sized (60mm base)
$200 for 40k Rhino chassis or similar, smaller fliers (Storm Talon)
$400 for 40k Land Raider, larger fliers (Storm Raven).
Forge World and Collossals - prices vary

These prices include all assembly and basing. If you already have models assembled, primed, or want to do the basing yourself, please contact me and we can talk about reducing the price.

What you get for your money - models will be cleaned of any mold lines and flash, assembled, primed, painted, based, and matte varnished for protection. Will always be beyond the 3 color minimum for tournaments, and will include the little details that we all want. I will paint an army for you that I would be proud to play with myself. I will do custom color schemes, as well as traditional "from the book" schemes. I only have one level, and that is fully painted.

About Me

I paint models and have been doing it since I was 12. Over the years I have learned tons of tricks and painted loads of models. I have ran a very successful Miniatures studio, and owned a Retail Game Store. After closing those, I decided to get a little smaller with the operation and I am back to a one man show.

Search This Blog

9/30/08

Painting area

So after yesterdays fiasco, I have made plans to clean up and organize my painting area. As a quick band aid, I have installed a rail shelf system on the wall over my desk. I had thought about putting the baby gates up around the desk, but since we are already pressed for space, that would be just unruly, and plainly a pain in the ass. I can always add another shelf below the one I have, but then I have to move my painting lamp to my painting area, and the desk lamp to a higher shelf. This will negatively affect the available lighting sources I have to work with, so I will need to be creative on the next batch of shelves I put up.

I am thinking a side shelf to the left, mounted to a third track, and sitting about 5 inches lower than the other one. I can put the desk lamp on the right side, and move the photo station to the left.

I will either find my desktop tripod or buy another one this weekend for quick pics of new finished models.

Here is what I have right now:
My goal over the next few weeks or so is to get a setup more like Tom Schadle's. Tom is a multi Demon winner, a great painter and hobbyist, and him and his wife are just really nice people. The paint storage racks are made of wood, and he was able to make them with about $20 worth of supplies from Home Depot, using basic tools, all of which I have access to.

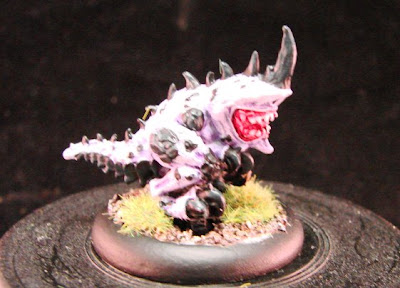
Legion for Caleb - Done

Not entirely sure I like the way these models came out. After my daughters trip thru Wash Land, I was left without washes to use, so had to revert to using ink washes to undertone the flesh.

The creautres ended up with a pretty nice purple hue, but Lylyth came out really nice.

Total paint time for all 6 models is about 6 hours.


9/28/08

This weekend in Gaming

Well, got in two good games today, one against Caleb (Nasir's Son) and on against the Nas himself.

Narrow victory against Caleb (learner game) and a severe beating by Nasir. Pretty good time!

9/27/08

Weekend Work


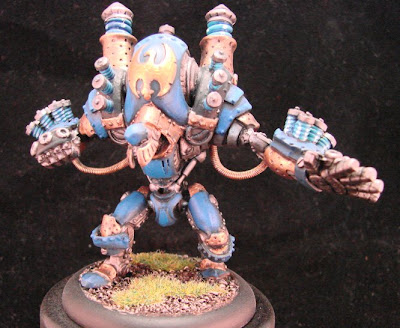
Cygnar Thunderhead - Going on Ebay tomorrow - 2 hrs of paint time


8 Khorne Berzerkers, with Rhino - Going on Ebay tomorrow - 8 hours of paint time


Warcaster Sorscha Kratikoff - Going on Ebay tomorrow - 2 hours of paint time


Madrak Ironhide - I like this one better than the other one, SO the other one goes on Ebay and I keep this one! - 3 hours of paint time


9/26/08

Project Thunderhead

Oops, I did it in 2 hours. So much for my Friday night Project


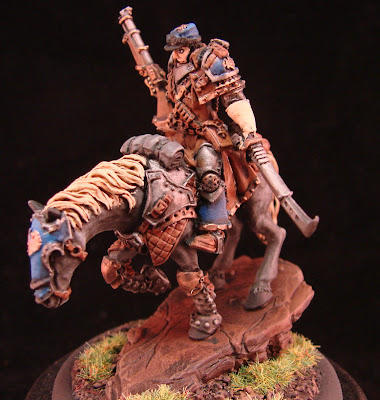
Captain Kraye Finished

Okay, so this has to be the coolest model I have ever painted......Ever. I really like the dramatic and lonesome feel that Kraye has. The solo cowboy look.....It is stupid cool. I added a few more levelsto highlights, really wanting to maximize the use of the blues.

Oh, yeah and these pics are HUGE, so click to enlarge!

Total paint time - 4 hours

9/25/08

New Painting Challenge

Okay, New Painting Challenge, something we all can take part in. Challenge starts Sept 29th. :)

- Challenge Rules -

Mike - 8 hrs max a week, Saturdays only! Complete 1000 points of Trollbloods by November 29.

Adam - 15 hrs max a week. Complete 1000 points of Cryx by November 29. Use the list that Shane sent you. Call Emopire Games to have the stuff sent to you! 20% off, and free shipping!

Shane - 15 hrs max a week. Complete an additional 1000 points of Everblight by Nov 29. Just so you can be involved!


Status updates need to be posted on our blogs for everyone to see!

- The Prize -

Whomever completes the challenge gets a free Epic Warcaster or Warlock paint job from me ( a $60 value)! If I complete - you guys each buy me a model for my next Army (lols)

Proposed Army lists -

Mike - Since I have no idea what I am doing, i am building my army from models I have and ones I want to paint :)
Army: Mike's Challenge Army!
Faction: Trollbloods
Army Points: 998/1000
Victory Points: 33

Chief Madrak Ironhide
Grim Angus
Dire Troll Blitzer
Dire Troll Blitzer
Troll Axer
Troll Axer
Troll Impaler
Troll Impaler
Troll Impaler
Troll Impaler
Kriel Warriors (9)
Trollkin Champions

Storm Guard Re-Pop Finished!

Here is the re-pop. I really wish I would have taken a picture of the "before" models. Basically, the guy that "painted" these models before basically did all of my base coats for me. Hind sight, I should have washed the model with Badab Black to tone down the silver. I painted the quilted armor in brown, and redid the shoulders and tabards in blue, matching the scheme on the Storm Lancers. I also blacked out the hafts of the Halberds, so there is a seperation between armor and weapon. Can't wait to try this scheme out on some Cygnar Warjacks. Basing will be finished off tonight.

Total paint time - 10 models - 3 hours

9/24/08

Epic Allister Caine Done!

Epic Allister Caine - total paint time - 2 hours, including work on the StormGuard Re-Pop. Stormguard will be done tonight. Same basic color scheme as was used on the Storm Lancers, with many steps that were identical.


Trencher Re-pop Finished

Another night another batch of models painted! The Max Flynn Model was a total failure. The last owner must have painted the damn thing 2 or 3 times, but I was able to pull off a good job of making him look like a trencher. A total of 3 hours of painting to add 4 models to the squad, and to make them all match!


9/23/08

Storm Lancer Tutorial Completed

Okay, you guys asked for it, here it is. No, not a Youtube video, but a step by step tutorial

Storm Lancers -
Step 1:
I normally paint inside out,but since this model will contain a minimum of two different washes, I opted to go with an alternative method. Paint the bigger areas first.
Dry Brush entire model with Adeptus Battle Grey. Pay particular attentionto any showing parts of the horse.

Step 1 colors used - Adeptus Battle Grey (GW)

Step 2:
Paint all armor areas with Chainmail. Neatness is not so much a factor here as we will be repainting over a few areas in the next step I start from the top down ensuring each and every part that I want to be "armor" is painted that way

Step 2 colors used - Chainmail (GW)
Step 3:
Okay, now neatness counts. On the test model, I noticed the P3 paints do not cover silver so well. The metal shines thru, and I want a nice dark base, so time to "black out" all of the areas that are to be blue. I know from experience that Burnished Gold does not cover light areas too well either, so we'll black those out too. On the shoulder pads and, horse head, and flank armor, blackout just the insides with black, leaving the silver raised edges showing. Also, take this time to repaint any primered areas that have chipped during handling. I use Vallejo Game Color Black due to the nice consistancy.
Step 3 colors used - Chaos Black - Vallejo Game Color

Step 4:
Adding the Cygnar Blue is super easy, but again, neatness counts. Paint the inside of the head and flank armor, should guards, barding and the front of the shield with Cygnar Blue Base. This goes over black in a single smooth coat.

Step 4 colors used- Cygnar Blue Base (P3)

Step 5:
Okay, now the very last basecoating stage! At this point we are about 80% of the way done with the models! Using Burnished Gold, paint over the last of the blacked out areas! Make sure to hit the Cygnar falcon on the shield, shoulder and front bridle plate! Again, neatness counts here BIG TIME!!!!!!!
Step 5 Colors used - Burnished Gold (GW)

This is the stopping point for the night. No real back breakers here, and I spent 2 hours clock time painting (including smoke breaks and picture taking) Tomorrow starts the real fun as we start our washes, and finishing details!
Currently we have 5 colors used, but the last steps should increase that about 3-5 more colors!

Step 6 (1200 pm)
Wash entire model with Badab Black Wash. No need to thin it, as it is already thin enough.
Also, neatness isn't much of a factor here. Then Wait for the wash to dry.
Step 6 colors used - Badab Black Wash (GW)

Step 7
Grab your detail brush, as neatness is key on this step. Take Bestial Brown (Beasty Brown)
and pick out all the quilted armor and leather straps. Neatness is paramount here, because
for the most part, all the other areas are done!
Step 7 Colors Used - Bestial Brown (GW) or Beasty Brown (Vallejo)

Step 8
Again, detail brush and neatness rule supreme on this step. Grab your brown ink / wash
and start coating the areas painted in the last step. You can water the ink down a bit, but
we want a good dark coat! once that is done, timeto sit and wait for the ink to dry.
Step 8 Colors used - Brown Ink (GW) or Devlan Mud (GW)

Step 9
Part A
Now for the most time consuming part. Multi Stage Highlights on the blue parts of the armor
This is really easy enough. Starting at the bottom of the armor plate, leave a small gap
where the Cygnar Blue Base was washed showing and lightly paint upwards to the top of the armor plate.

Part B
Now mix a 50/50 mix of Cygnar Blue Base and Cygnar Blue Highlight, and apply about 2/3 of the way out on the plate.
Part C
Now add another smaller part at the top rounded edge of the plate with Cygnar Blue Highlight, and the highlights are done.
Part D
Reapply Cygnar Blue Base to all of the raised portions of the blue barding,and then apply a very thin line of Cygnar Blue Highlight to the Barding and that part is done.
Step 9 Colors used - Cygnar Blue Base and Cygnar Blue Highlight (P3)

Step 10


Repaint the Burnished Gold on the Cygnar symbols on the shield, horse chest bridle, and shoulder, and the model is done! Base and matte varnish, and then go play games!

First Cygnar Model Ever.....

So I completed the first "test model" for Shane's StormLancers. First time I ever tried to paint anything Cygnar.

Cygnar Storm Lancer - Total Paint time - 2 hours


On the remaining models, I will put together a step by step to show how it is all done. This technique is what I am using on all of the models in this and future armies. The Man'owar was a real good test for the new GW washes.

9/22/08

Models from this weekend

So, after about 11 hours of gaming, spread over 2 days, with two different opponents, I got a bit of painting done. These are the first contract models I have painted in over a year.

Khador Old Witch and Scrap Jack:
Total Paint Time on the Old Witch - 1.5 hrs

Total Paint Time on the Scrap Jack - 1.5 hrs

Man'O War Kovnik

Total Paint Time on Man'O War Kovnik - 1.5 hours

Switched out the bulbs on my lamps to my "daylight bulbs" This has cut the yellow hue out of the diffuser. Made it even better with a top light, again, a daylight bulb.

*A quick note on the new GW washes - Freakin Awesome. Painting the Manowar was so simple. Base coat the main colors, wash with Badab Black, and the brighten the red back up. Made this thin fly by!


9/17/08

Some really old model picks

Blasts From The Past!
Digging thru my old desktop, I came across these pictures of some of my old models!

My Falcon Grav Tank - purple and green FTW! circa 1999 (personal army)


My third army painted after my illustrious return to mini painting. A Foot Slogging Ork Army, circa 1999 (personal army)

Incubi Lord Entered in GD Baltimore 2000

Legolas and Gimli, painted for Gabbie - Circa 2002

Limited Edition Emperor's Champion - My first shot at NMM - Circa 2001

Empire General, Circa 2002 (personal army)

Wildly Converted Boba Fett Model - Circa 2003 (contract)

Lizardmen Saurus Circa 2004 (personal army)

And since I opened the store in 2005, we all know the rest.


9/14/08

Trollkin - Like orks but bigger!

Yeah, because they have big ass axes and spears

Okay, so I dug these guys out and started doing repairs. *Note* I did not paint these models. These were done by Andrea, one of my old painters.
I am super critical of people that paint for me, and Andrea was no exception. She is an extra-ordinary painter, but she is lazy, sloppy and inconsistent. Lots of over paint on areas that had to be cleaned up, and little tweaks to make the models stand out a bit more. Overall, I'mhappy with the way they look, but will need a quick"makeover" to get them up to par.
Here are some of the low points on these models before I start the "makeover"

  • Basing blends into the model - to be solved by a repaint and dry brush in greens, and new static grass applied over the old stuff. Never base brown models with brown basing.
  • None of the models were pinned - these are some pretty big models, being "Light Warbeasts," and all metal. When they got scattered in the garage, most broke at assembly points. To solve that when they break again, I will pin the parts back on.
  • Natural feel, but almost too natural - I love the natural look of the models, but about 90% of the model is done in brown of some sort, including a Brownish Grey for the flesh. The metals are heavily glazed, and do not stand out too much. Basically, at about 3 feet, they look like a brown blur - Part 1 of the "makeover" has started. Instead of the dark red gore of the hair, I lightened it up all the way to Blood Red. I have also added some missed details in the form of finger and toe nails which I painted Rotting Flesh and gave a brown ink wash over. I will be picking out some of the lighter browns in Bleached Bone. I will also be cleaning up the armor with a light drybrush ofthe base color.
  • These models have an almost Celtic feel to them, with tartans (Clan Tabards) on each of them, but they blend in with the model. I will be chosing a contrasting color, probably a red /black plaid, to make it stand out. I'll search the Tartan Ferret for an example to paint on

Madrak Ironhide


Trollkin Axer


Trollkin Impaler


Trollkin Impaler

Khador - 5th Border Legion


Because I hate red warjacks